共计 6776 个字符,预计需要花费 17 分钟才能阅读完成。
Echo程序升级
现在我们需要升级我们的Echo网络程序,将整个程序拆分为客户端(Client)和服务端(Server)。
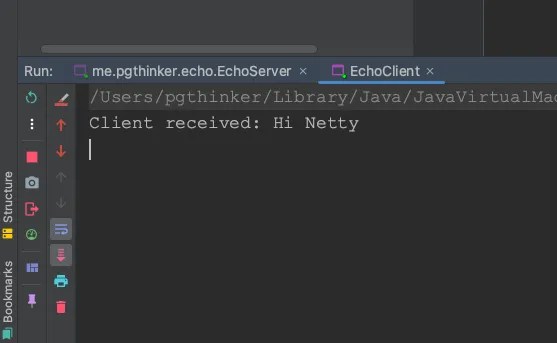
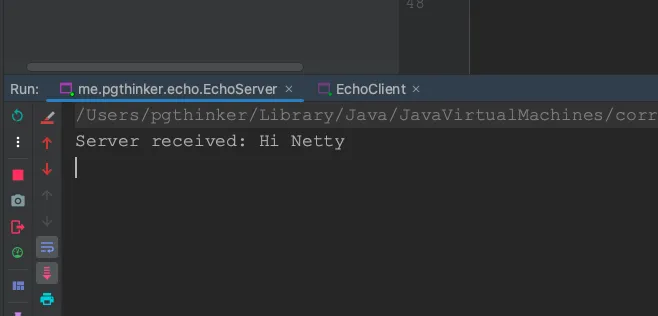
需求说明:当客户端与服务端建立起连接后,向服务端发送一条消息。服务端收到消息后,再将消息原封不动地发送给客户端。
设计说明
在之前介绍Netty核心组件时就提到过,我们使用Netty实现的网络程序其核心业务都是通过ChannelHandler来实现的。ChannelHandler处理ChannelPipeline中流入或流出的数据以此实现我们的具体的业务。因此我们需要创建两个Handler:EchoClientHandler和EchoServerHandler。
- EchoClientHandler功能:Channel连接时发送一条数据给服务端;收到来自服务端的消息时,输出到控制台;
- EchoServerHandler功能:Channel连接时打印一段话至控制台表示有客户端进行了连接;收到来自客户端的消息时,将该消息发送给客户端。
EchoClientHandler
对于EchoClientHandler,我们可以使用SimpleChannelInboundHandler。这里为什么可以使用流入的Handler处理?因为功能较为简单,建立连接时向服务端发送消息可以通过Channel的生命周期HookchannelActive实现。这个Hook会在Channel建立连接时调用。此时我们就可以向服务端发送一条消息即可。
package me.pgthinker.echo.handler;

import io.netty.channel.ChannelHandler;
import io.netty.channel.ChannelHandlerContext;
import io.netty.channel.SimpleChannelInboundHandler;

/**
 * @Project: me.pgthinker.echo.handler
 * @Author: pgthinker
 * @GitHub: https://github.com/ningning0111
 * @Date: 2024/9/1 17:04
 * @Description: Echo客户端Handler, 当接收到来自服务端的数据时,打印数据
 */
@ChannelHandler.Sharable
public class EchoClientHandler extends SimpleChannelInboundHandler<String> {

    // 建立连接后执行 只会执行一次 这里用来模拟客户端向服务端发送一条消息
    @Override
    public void channelActive(ChannelHandlerContext ctx) {
        ctx.writeAndFlush("Hi Netty");
    }

    // channel中有读事件时执行
    @Override
    protected void channelRead0(ChannelHandlerContext ctx, String msg) throws Exception {
        System.out.println("Client received: " + msg);
    }

    // 抓到异常时执行
    @Override
    public void exceptionCaught(ChannelHandlerContext ctx,
                                Throwable cause) {
        cause.printStackTrace();
        ctx.close();
    }
}
在 Netty 中,
@Sharable注解是一个特别的注解,用于标记可以被多个 Channel 共享的处理器(Handler)。这种设计主要是为了支持在处理不同 Channel 的并发请求时,避免创建多个处理器实例,从而提高系统性能并减少内存开销。
EchoServerHandler
对于EchoServerHandler,我们同样可以使用SimpleChannelInboundHandler。
package me.pgthinker.echo.handler;

import io.netty.channel.*;

/**
 * @Project: me.pgthinker.echo.handler
 * @Author: pgthinker
 * @GitHub: https://github.com/ningning0111
 * @Date: 2024/9/1 17:10
 * @Description:
 */
@ChannelHandler.Sharable
public class EchoServerHandler extends SimpleChannelInboundHandler<String> {

    @Override
    public void channelRead0(ChannelHandlerContext ctx, String msg) throws Exception {
        System.out.println("Server received: " + msg);
        // 接收到消息后 写回去
        ctx.writeAndFlush(msg);
    }

    @Override
    public void exceptionCaught(ChannelHandlerContext ctx, Throwable cause) throws Exception {
        cause.printStackTrace();
        ctx.close();
    }
}
实现启动类
完成Client和Server的Handler后,我们就可以创建Bootstrap来装配这些组件启动Netty网络应用程序了。因为我们的handler处理的对象是String,因此我们需要加入String的编码器和解码器。这两个东西需要添加在我们自定义的Handler之前,以此保证数据流入到我们自定义的Handler时是以String类型传入进行处理的。
ServerBootstrap
服务端启动类
package me.pgthinker.echo;

import io.netty.bootstrap.ServerBootstrap;
import io.netty.channel.ChannelFuture;
import io.netty.channel.ChannelInitializer;
import io.netty.channel.nio.NioEventLoopGroup;
import io.netty.channel.socket.SocketChannel;
import io.netty.channel.socket.nio.NioServerSocketChannel;
import io.netty.handler.codec.string.StringDecoder;
import io.netty.handler.codec.string.StringEncoder;
import me.pgthinker.echo.handler.EchoServerHandler;

import java.net.InetSocketAddress;

/**
 * @Project: me.pgthinker.echo
 * @Author: pgthinker
 * @GitHub: https://github.com/ningning0111
 * @Date: 2024/9/1 16:55
 * @Description:
 */
public class EchoServer {

    private final static int PORT = 8778;

    public static void main(String[] args) throws Exception{

        ChannelFuture future = new ServerBootstrap()
                .group(new NioEventLoopGroup())
                .channel(NioServerSocketChannel.class)
                .childHandler(new ChannelInitializer<SocketChannel>() {
                    @Override
                    protected void initChannel(SocketChannel ch) throws Exception {
                    // 添加字符串编码(相对于流出数据而言的)其和解码器(相对于流入数据而言的)
                        ch.pipeline().addLast(new StringDecoder());
                        ch.pipeline().addLast(new StringEncoder());
                        ch.pipeline().addLast(new EchoServerHandler());
                    }
                })
                .localAddress(new InetSocketAddress(PORT))
                .bind()
                .sync();
        future.channel().closeFuture().sync();
    }
}
Bootstrap
客户端启动类:
package me.pgthinker.echo;

import io.netty.bootstrap.Bootstrap;
import io.netty.channel.ChannelFuture;
import io.netty.channel.ChannelInitializer;
import io.netty.channel.nio.NioEventLoopGroup;
import io.netty.channel.socket.SocketChannel;
import io.netty.channel.socket.nio.NioSocketChannel;
import io.netty.handler.codec.string.StringDecoder;
import io.netty.handler.codec.string.StringEncoder;
import me.pgthinker.echo.handler.EchoClientHandler;

import java.net.InetSocketAddress;

/**
 * @Project: me.pgthinker.echo
 * @Author: pgthinker
 * @GitHub: https://github.com/ningning0111
 * @Date: 2024/9/1 16:55
 * @Description:
 */
public class EchoClient {

    private final static int PORT = 8778;
    private final static String HOSTNAME = "localhost";

    public static void main(String[] args) throws Exception {
        NioEventLoopGroup group = new NioEventLoopGroup();
        ChannelFuture future = new Bootstrap()
                .group(group)
                .channel(NioSocketChannel.class)
                .remoteAddress(InetSocketAddress.createUnresolved(HOSTNAME, PORT))
                .handler(new ChannelInitializer<SocketChannel>() {
                    @Override
                    protected void initChannel(SocketChannel ch) throws Exception {
                        ch.pipeline().addLast(new StringDecoder());
                        ch.pipeline().addLast(new StringEncoder());
                        ch.pipeline().addLast(new EchoClientHandler());
                    }
                })
                .connect()
                .sync();
            future.channel().closeFuture().sync();
    }

}
测试


Echo-Plus
上面的案例是客户端与服务端建立连接后发送消息,并且接收到消息后断开。现在,我们想让客户端通过读取控制台输入的信息发送给服务端,接收到服务端后再将数据打印到控制台。如何实现呢?
首先需要明确,实现Echo-Plus是不需要修改服务端任何代码的,应该从客户端的代码入手。在介绍Netty核心组件时就有介绍过ChannelFuture。这个是Netty执行异步操作后的结果抽象。将控制台输入的信息读取到然后发送到Channel这个过程就可以看成是一个异步操作。我们在创建客户端启动器时,建立连接后得到的就是一个ChannelFuture对象。我们可以通过该对象获取对应的Channel,从而实现一系列往Channel中输入数据的操作。
所以要实现这样的功能,我们可以这样写:
package me.pgthinker.echo;

import io.netty.bootstrap.Bootstrap;
import io.netty.channel.ChannelFuture;
import io.netty.channel.ChannelInitializer;
import io.netty.channel.nio.NioEventLoopGroup;
import io.netty.channel.socket.SocketChannel;
import io.netty.channel.socket.nio.NioSocketChannel;
import io.netty.handler.codec.string.StringDecoder;
import io.netty.handler.codec.string.StringEncoder;
import me.pgthinker.echo.handler.EchoClientHandler;

import java.net.InetSocketAddress;
import java.util.Scanner;

/**
 * @Project: me.pgthinker.echo
 * @Author: pgthinker
 * @GitHub: https://github.com/ningning0111
 * @Date: 2024/9/1 21:01
 * @Description:
 */
public class EchoClientPlus {
    private final static int PORT = 8778;
    private final static String HOSTNAME = "localhost";

    public static void main(String[] args) throws Exception {
        NioEventLoopGroup group = new NioEventLoopGroup();
        ChannelFuture future = new Bootstrap()
                .group(group)
                .channel(NioSocketChannel.class)
                .remoteAddress(InetSocketAddress.createUnresolved(HOSTNAME, PORT))
                .handler(new ChannelInitializer<SocketChannel>() {
                    @Override
                    protected void initChannel(SocketChannel ch) throws Exception {
                        ch.pipeline().addLast(new StringDecoder());
                        ch.pipeline().addLast(new StringEncoder());
                        ch.pipeline().addLast(new EchoClientHandler());
                    }
                })
                .connect()
                .sync();
        Scanner scan = new Scanner(System.in);
        while (scan.hasNextLine()){

            String line = scan.nextLine();
            if("quit".equals(line)){
                future.channel().closeFuture();
                group.shutdownGracefully();
                break;
            }

            future.channel().writeAndFlush(line);
        }

        future.channel().closeFuture().sync();
    }
}
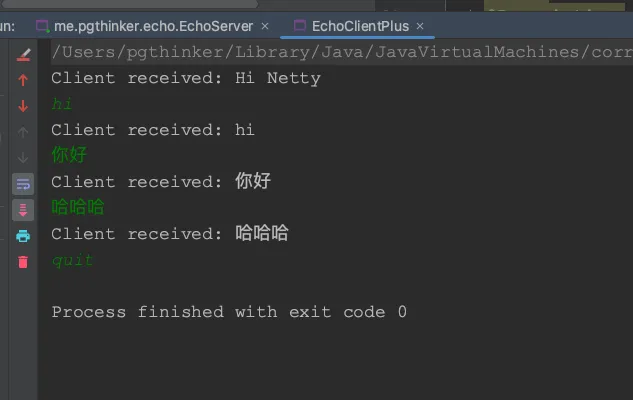
EchoClientPlus不同的一点是,通过ChannelFuture获取channel对象实现往channel中写入数据。当我们输入quit时,就能断开客户端与服务端的连接。效果如下:


