共计 4075 个字符,预计需要花费 11 分钟才能阅读完成。
内容目录
1. 版本确定
- node >= 14。本篇使用的v18.16.0
2. 安装Vite
npm install -g @vue/cli3. 创建项目
// npm创建
npm create vite@latest 项目名称

// yarn创建
yarn create vite 项目名
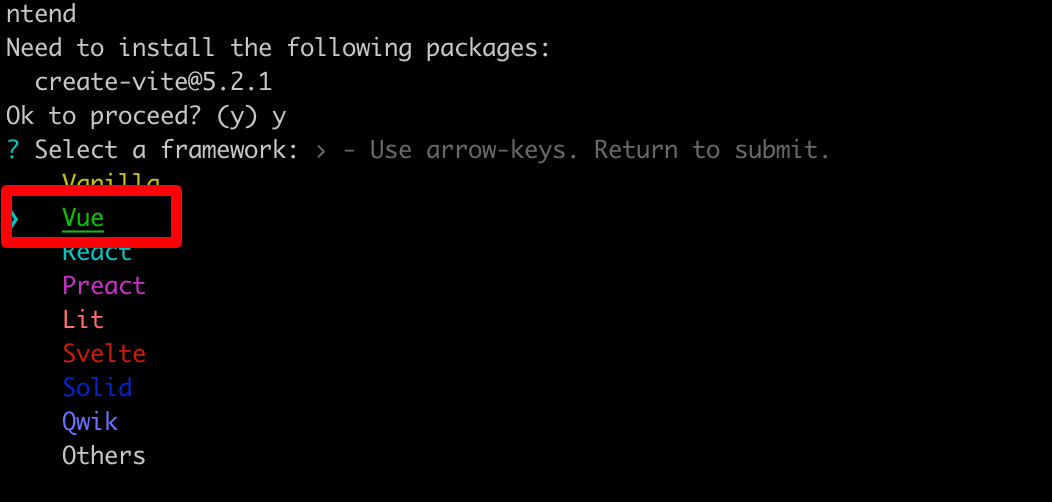
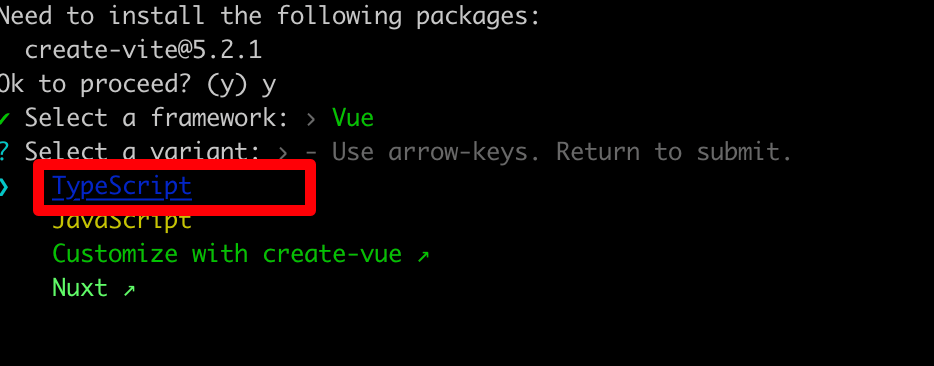
4. 选择基础框架


执行npm install安装Vue3 + TS

4.1 安装Sass
npm add -D sass
4.2 安装router
npm install vue-router
4.3 安装Pinia(状态管理工具)
npm install pinia
4.4 安装Axios
npm install axios
4.5 安装Element Plus
npm install element-plus --save
4.6 安装按需自动导入的插件
npm install -D unplugin-vue-components unplugin-auto-import
5. 项目配置
5.1 配置@/src
vite.config.ts文件:
import { defineConfig } from "vite";
import vue from "@vitejs/plugin-vue";

import { resolve } from "path";

// https://vitejs.dev/config/
export default defineConfig({
  plugins: [vue()],
  resolve: {
    alias: {
      "@": resolve(__dirname, "./src"),
    },
  },
});
若resolve无法从path中导入,则需要执行下述指令:
npm install @types/node --save-dev
tsconfig.json文件:
{
  "compilerOptions": {
    "target": "ES2020",
    "useDefineForClassFields": true,
    "module": "ESNext",
    "lib": ["ES2020", "DOM", "DOM.Iterable"],
    "skipLibCheck": true,

    /* Bundler mode */
    "moduleResolution": "bundler",
    "allowImportingTsExtensions": true,
    "resolveJsonModule": true,
    "isolatedModules": true,
    "noEmit": true,
    "jsx": "preserve",

    /* Linting */
    "strict": true,
    "noUnusedLocals": true,
    "noUnusedParameters": true,
    "noFallthroughCasesInSwitch": true,
    /* 配置@ */
    "baseUrl": ".",
    "paths": {
      "@/*": ["src/*"]
    }
  },
  "include": ["src/**/*.ts", "src/**/*.tsx", "src/**/*.vue"],
  "references": [{ "path": "./tsconfig.node.json" }]
}
5.2 router配置
src下创建一个router文件夹,创建index.ts和config.ts文件。
config.ts文件
let routes = [
  {
    path: "/",
    name: "home",
    component: () => import("@/view/组件名"),
  },
];

export default routes;
index.ts文件:
import { createRouter, createWebHistory } from "vue-router";
import routes from "./config";

const router = createRouter({
  history: createWebHistory(),
  routes,
});

export default router;
main.ts文件中引入router
import { createApp } from "vue";
import "./style.css";
import App from "./App.vue";
// 导入router
import router from "@/router";

const app = createApp(App);

// 使用router
app.use(router);

app.mount("#app");
5.3 pinia配置
main.ts文件中引入pinia
import { createApp } from "vue";
import "./style.css";
import App from "./App.vue";
// 导入router
import router from "@/router";
// 导入pinia
import { createPinia } from "pinia";
const pinia = createPinia();

const app = createApp(App);

// 使用router
app.use(router);
// 使用pinia
app.use(pinia);

app.mount("#app");
5.4 axios配置
axios封装,src下创建http文件夹,创建index.ts和config.ts文件。
config.ts文件
// 后端接口地址
export const BASE_URL = "https://api.example.com/api/v1";
// 请求头的基本信息
export const HEADER = {
  "Content-Type": "application/json;charset=UTF-8",
};
index.ts文件
import axios from "axios";
import { BASE_URL, HEADER } from "./config";

const service = axios.create({
  baseURL: BASE_URL,
  // timeout: 10000,
  withCredentials: false,
  headers: HEADER,
});

// 请求封装
const request = {
  get(url: string, params?: any) {
    return service.get(url, { params });
  },
  post(url: string, data?: any) {
    return service.post(url, data);
  },
  put(url: string, data?: any) {
    return service.put(url, data);
  },
  delete(url: string, params?: any) {
    return service.delete(url, { params });
  },
};

// 创建请求拦截器
service.interceptors.request.use(
  (config) => {
    const token = localStorage.getItem("token");
    if (token !== null) {
      config.headers.Authorization = "Bearer " + token;
    }
    return config;
  },
  (error) => {
    console.log(error);

    return Promise.reject(error);
  }
);

// 创建响应拦截器
service.interceptors.response.use(
  (res: any) => {
    console.log(res);
    return res.data;
  },
  (error) => {
    let message = "";
    console.log(error);
    return Promise.reject(message);
  }
);

export default request;
5.5 Element Plus配置
main.ts文件中引入Element Plus.
import { createApp } from "vue";
import "./style.css";
import App from "./App.vue";
// 导入router
import router from "@/router";
// 导入Element Plus
import ElementPlus from "element-plus";
import "element-plus/dist/index.css";
// 导入pinia
import { createPinia } from "pinia";
const pinia = createPinia();

const app = createApp(App);

// 使用router
app.use(router);
// 使用pinia
app.use(pinia);
// 使用Element Plus
app.use(ElementPlus);

app.mount("#app");
5.6 自动导入配置
vite.config.ts文件:
import { defineConfig } from "vite";
import vue from "@vitejs/plugin-vue";
// 引入自动导入
import AutoImport from "unplugin-auto-import/vite";
// 自动导入UI组件
import Components from "unplugin-vue-components/vite";

import { resolve } from "path";

// https://vitejs.dev/config/
export default defineConfig({
  plugins: [
    vue(),
    AutoImport({
      // 不在需要导入ref,reactive等
      imports: ["vue", "vue-router"],
      // 存放的位置
      dts: "src/auto-import.d.ts",
    }),
    Components({
      // 引入组件的信息存放位置
      dts: "src/components.d.ts",
    }),
  ],
  resolve: {
    alias: {
      "@": resolve(__dirname, "./src"),
    },
  },
});
正文完
